

This rainy day activity from our contributor Maria Provenzano is our favorite type of DIY—it’s easy enough to do with kids, but the result is cute enough to give as a gift. You can customize the shapes for any holiday or interest by simply using different silicone molds. Pandemic-related bonus? You’ll be encouraging more frequent hand-washing!
DIY Soap Molds
Supplies
- Goats milk soap or any other type of white-based soap
- Glycerin soap
- Soap colorant
- Microwave safe bowl
- Spatula or popsicle sticks for stirring
- Silicone molds (lego molds, rectangle molds, letter molds)
- Cutting board
- Knife
- Paper Mart Soap Boxes With Window
Directions
Note: Keep the temperature of the soap below 160 degrees for the best results.
- Cut the white soap with a knife into small cubes and place in a microwave-safe bowl.
- Melt in a microwave-safe bowl according to directions; I recommend about 15 seconds then mix and repeat. *You can add essential oils to this as well. We decided against it since my son has eczema and we try not to used anything with scents on his skin.*
- Add the soap colorant to the melted soap and pour it into silicone molds as desired.
- Allow the soap to completely harden up and remove it from the molds. If you want to create a bar of soap with the designs in the inside then place the soap shapes into the rectangle molds while you melt the clear soap.
- Cut the glycerin soap into small cubes and repeat the same melting process.
- Once it’s melted, allow it to cool to almost room temperature (be sure to stir it so the top doesn’t create a film).
You can do this two ways:
One way you can do this is to let the glycerin soap cool enough so that it won’t melt the other soap when you pour it and then simply pour it over the lego soap. When doing this, you only want to pour enough so that it’s JUST above the lego shape. If you pour too much then you won’t see the shapes. (refer to the video for this)
Another way is to pour the glycerin soap into the rectangle molds first, let it cool, and then place the lego soap shaped (or whatever shape you are using) into the already poured, melted, and cooled glycerin soap. Just be sure to watch out for the top of the soap because it can harden as you wait. Either way works as long as your timing is on point.
Note: Once everything is set up you can package them in a really pretty way. I’m obsessed with these boxes from Paper Mart because they are specific for soap!! They have a little window on the top so you can see what’s inside! I just tied it with a cute piece of twine and they were ready to go.
More DIY from Maria:

An Interview with KIDBOX’s CEO Miki Racine Berardelli
A few months ago, we shared our new secret weapon when shopping for kids’ clothes, KIDBOX. So by now you’re probably familiar with this amazing children’s clothing subscription service that takes the tantrums out of the dressing room, by delivering a...
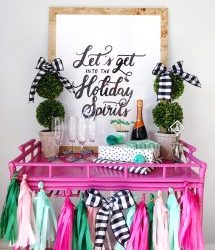
How to Style a Festive Bar Cart
If you’re hosting a New Year’s Eve party this year, stocking the bar is likely a priority. But in this Instagram age, why not make the cocktail setup as beautiful as it is functional? Your guests will surely appreciate the extra effort, whether or not...

Traveling with Kids: How to Make it Better for Everyone
If you’re traveling this winter, you might be dreading the part where you tote your tired and bored kids on long stretches through planes, trains and automobiles. To get some tried and true advice, we turned to two people who are more experienced at...