
This piece was contributed by our DIY contributor Maria Provenzano and originally appeared on her site, From Scratch with Maria.
DIY RAINBOW ART
Materials:
White paper, preferably card stock but any white paper will work.
Paint, preferably in the colors of the rainbow
Small piece of cardboard or an additional piece of paper that is folded in half twice to create a thick edge
Directions
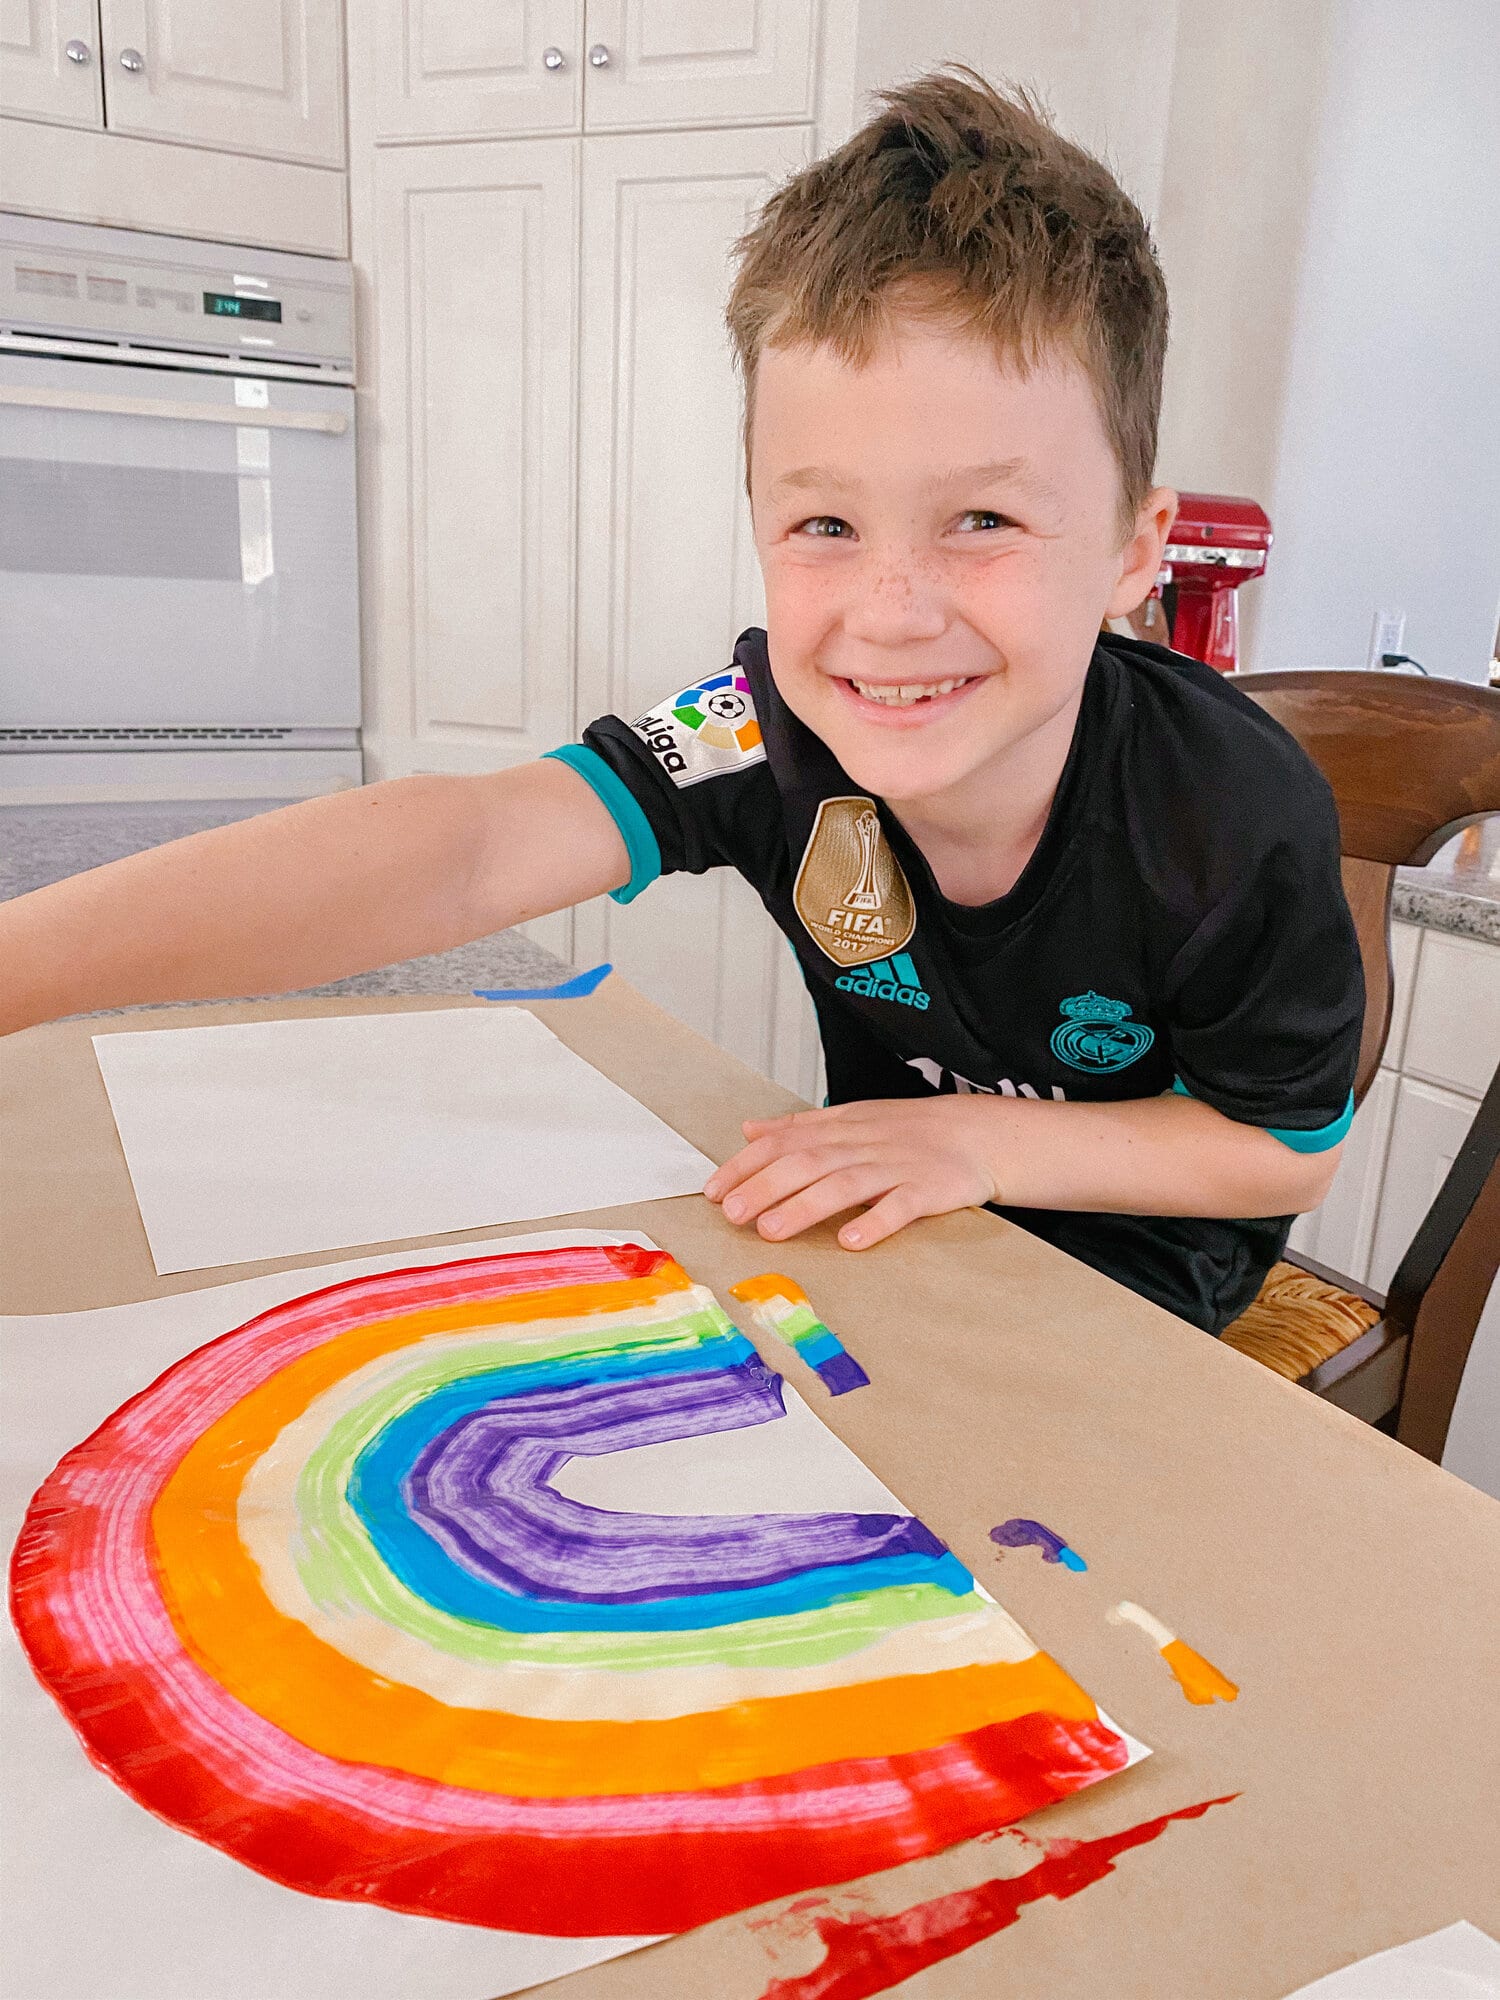
Lay a white piece of paper onto a covered surface horizontal.
Start on the bottom left side of the white piece of paper and apply dots of paint starting on the outside and moving your way in with the rainbow colors (red, orange, yellow, green, blue) The red dot should be the largest dot (about the size of a quarter) and slightly make the dots smaller as you get to the purple.
With the cardboard or folded piece of paper and start at the bottom of the page, below the paint, swipe the paint by pressing the edge of the cardboard or paper just under the paint and around so that it will carry the paint to the other side of the paper. Swipe the paint up and then back down in a large upside down “u” shape to create a rainbow shape.
For more from Maria, check these DIY ideas out:

Maple Pumpkin Pecan Muffins
These Maple Pumpkin Pecan Muffins are full of Fall flavor. Bake up a batch on the weekend to serve all week long as a grab-and-go breakfast! Thank you to our food contributor Kathleen Ashmore for sharing. Go to kathleenashmore.com to find all her recipes...

Try Dream Dinners for only $50!
Hello Richmond Mamas! I wanted to share an amazing deal with all you busy moms (and dads!) that has been such a help in our household for getting home cooked dinners on the table at least a few days a week with a fraction of the effort it usually takes. If you've been...
Meet a Mom: Rosemary D’Urso of Library Mom
Rosemary D’Urso, also known as the “Library Mom,” has been The Local Mom Network's go-to resource for fantastic book recommendations (for both kids as well as moms) for the past few years. From books to read to toddlers to summer reading picks, she never...